
vue-cli 也是一个 npm 包,可以帮助我们快速搭建起 vue 项目的脚手架。
环境说明
win10,node.js@10.15.0,vue-cli@3.2.1
安装
首先全局安装 vue-cli 3.x (这里以 3.2.1 版本为准):
npm install @vue/cli@3.2.1 -g为了对比 3.x 和 2.x 在项目创建上的区别,执行下面命令:
npm install @vue/cli-init@3.2.0 -g这样,我们可以通过 vue init 搭建 2.x 的项目结构,通过 vue create 搭建 3.x 的项目结构。
创建新项目
1) 2.x 版本
创建以 vuecli2test 命名的项目文件夹(注意不要用大写字母):
vue init webpack vuecli2test进行项目配置:
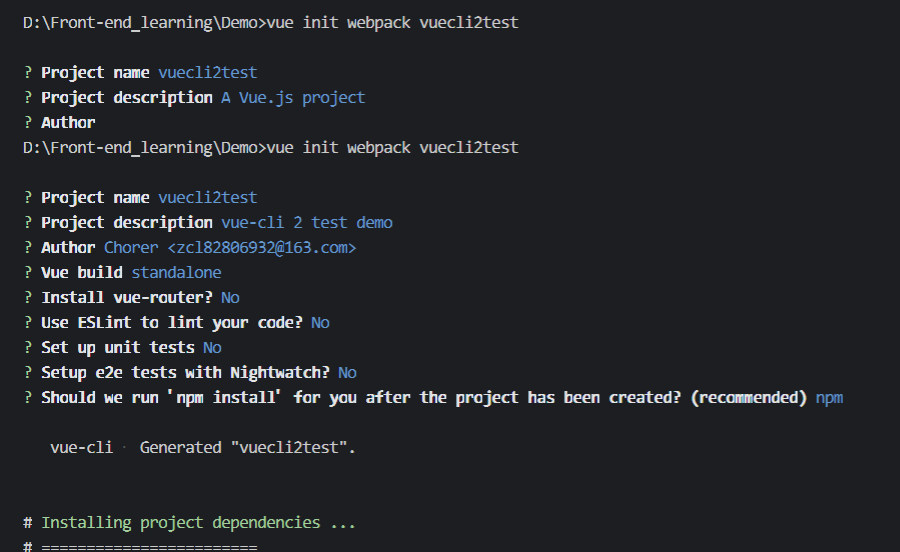
这里的 author 会自动读取以前全局配置的 gitconfig 文件的信息。
现在的项目文件夹结构是这样的:

跑一下项目看看:
npm run dev
2) 3.x 版本
创建以 vuecli3test 命名的项目文件夹:
vue create vuecli3test进行项目配置:

现在的项目文件夹结构是这样的:

和 vue-cli 2 进行对比:
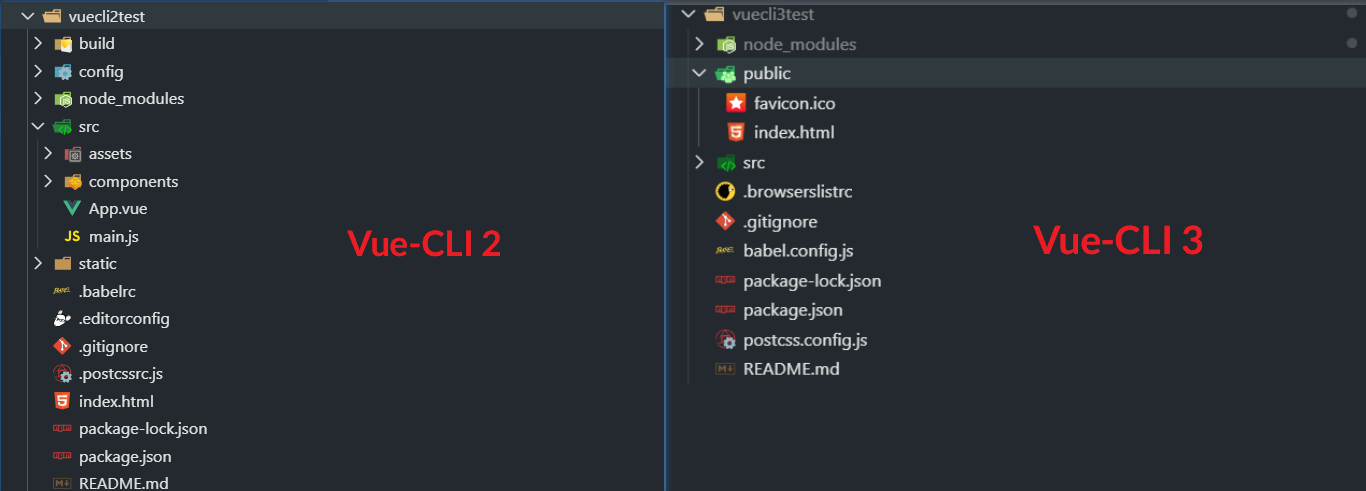
可以发现,相比 2.x 版本,3.x 精简了不少。首先是将 static 文件夹换成 public,原来根目录下的 index.html 也存放到了 public 里面,并且还移除了之前用来配置 webpack 的 build 和 config 文件夹(实际上在 node_modules 文件夹里)。
跑一下项目看看:
npm run servevue-cli 3.x 为我们提供了可视化配置的方式,可以通过下面的方式启动配置服务器:
vue ui之后导入项目文件夹,即可进入该项目对应的配置界面

另外,我们也可以在项目根目录下创建一个 vue.config.js 文件,自定义配置,这个文件之后会和 node_modules 中的配置文件进行合并。(就像是 sublime text 里面 settings-default 和 settings-user 的关系)
runtime+compiler 版本和 runtime-only 版本
创建项目的时候会让我们选择 runtime+compiler 版本或者 runtime-only 版本,那么这两个有什么区别呢?
runtime+compile (运行时编译)版本允许我们正常使用
template,但是相对的,需要经历 template —> ast —> render function —> vdom —> dom 等一系列过程才能将模板最终转化为真实 dom;runtime-only 版本(运行时)只允许在 .vue 文件中使用
template,其它地方要使用 render 函数,但是相对的,只需要经历 render function —> vdom —> dom 就能将模板最终转化为真实 dom。另外,引入组件的时候,.vue 中的template其实已经借助 vue-compile-template 编译成 render 函数了。
在 runtime+compile 版本中,new Vue 是这样的:
new Vue({
    el:'#app',
    template:<App/>
    components:{ App }
})
在 runtime-only 版本中,new Vue 则是这样的:
new Vue({
    el:'#app',
    render:h => h(App)
})
render 函数接受 h 参数 ,这个 h 实际上就是 createElement 函数, 它在这里接受一个组件对象 App 。
实际开发中用的更多的是 runtime-only 版本。
vue.config.js 配置说明
vue-cli 3.x 开始,不再提供单独的 webpack.config.js 文件,我们可以新建一个 vue.config.js 文件去修改 webpack 的配置。
基础配置
vue.config.js 的基础配置项比较简单,这方面可以参考 webpack 的配置
module.exports = {
    // 基础配置
    productionSourceMap: false,
    publicPath: './',
    outputDir: 'dist',
    assetsDir: 'assets',
    devServer: {
        port: 8090,
        host: '0.0.0.0',
        https: false,
        open: true
    },
    // 其他配置
高级配置
在项目开发中,我们肯定需要修改 webpack 的 rule 和 plugin 的配置。vue.config.js 提供了两种方式,一种是 configureWebpack,一种是 chainWebpack。
对于简单的修改,可以使用 configureWebpack。用法如下:
module.exports = {
    // 可以直接当作一个 webpack 配置对象去进行配置,最终会被合并
	configureWebpack: {
        module: {
            rules: []
        },
        plugins: []
    },
    // 可以作为一个函数,在内部修改 webpack 配置或者返回配置对象
    configureWebpack: config => {
        config.mode = 'production'
    }
}
对于更精细化的修改,可以使用 chainWebpack。它是基于 webpack-chain 这个库实现的,很多用法需要参考 webpack-chain。
下面是增加或者修改 rule/loader 的示例:
module.exports = {
    chainWebpack: config => {
        // 增加新的 rule/loader
        config.module
        	.rule('processSvg')                     // 自定义 rule 名
                .test(/\.svg$/)                         // 匹配应用规则的文件
                .include
                    .add('/src/assets/images')         // 匹配应用规则的文件所在的路径
                    .end()
                .use('svgLoader')                       // 自定义 use 名
                    .loader('svg-sprite-loader')            // 要使用的 loader
                    .options({                              // 传递给 loader 的选项
                        symbolId: 'svg-[name]'
                    })
        	        .end()
        		.end()
        	.rule('xxxx')
        		//......

        // 修改已有的 rule/loader
        config.module
        	.rule('processImages')                  // 自定义 rule 名
                .use('url-loader')                      // 要修改的 loader
                .tap(options => {
                    limit: 2048,
                    esModule: false
                })
    }
}
下面是增加或者修改 plugin 的示例:
const htmlWebpackPlugin = require('html-webpack-plugin')

module.exports = {
    chainWebpack:  config => {
        // 增加新的 plugin
        config.plugin('html')
        	.use(htmlWebpackPlugin,[{
                template: '/src/index.html'
            }])

        // 修改已有的 plugin
        config.plugin('html')
        	.tap(options => [{
                template: '/src/index.html'
            }])
    }
}
其他配置
vue.config.js 提供了独立的 css 配置项,其中的 loaderOptions 可以配置 css 的相关 loader:
module.exports = {
    css: {
        loaderOptions: {
            css: {...},                  // 配置 css-loader
            postcss: {...},              // 配置 postcss-loader
            sass: {...},                 // 配置 sass-loader 的 sass
            scss: {...},                 // 配置 sass-loader 的 scss
            less: {...},                 // 配置 less-loader
            stylus: {...},               // 配置 stylus-loader
        }
    }
}
提供了 pluginOptions,可以配置第三方插件:
const path = require('path')
module.exports = {
  pluginOptions: {
    'style-resources-loader': {
      preProcessor: 'scss',
      patterns: [path.resolve(__dirname,"@/assets/styles/global.scss")]
    }
  }
}